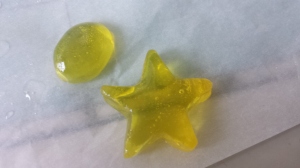
DIY Cast Resin Gems

Supplies you will need:

Castin’ Craft Mold Builder

Paper Clay

Easy Cast Clear Epoxy

Plastic Cups

Plastic Spoons

Pour On Gloss Finish

Sharpie of your color choice (I found that the bright color sharpies gave the best result for the resin gems)

Baking Sheet

Bowls you have at home

Brushes

Pliers

I got most of my supplies at Michael’s Craft Store and the brushes, plastic cups and plastic spoons at my local dollar store.

Step 1: I used paper clay because it’s air dry to make any shape you want. I made a star, oval and heart out of clay and let it dry for 24 hours.

Step 2: Spray your dry objects with the spray and once dried, lay them onto baking sheet.

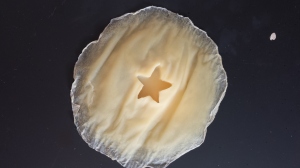
Step 3: Take your brush and put thin layers of the mold builder on the objects. Also brush around the objects too. Each time a layer is dry or almost dry, apply more layers until you feel your mold is thick enough. This may take several hours to complete. (The area around the object does not have to be as big as how I made it)

20141024_163127

Step 4: Once it is dry, remove the clay out of the mold.

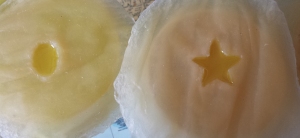
Step 5: The other side won’t look perfect so just use a pair of scissors to cut the unwanted edges of the inside of the mold to look similar to the picture below.

20141024_164532

Step 6: Fill one of the plastic cups with water and pour into the mold. This will determine how thick you want your object to be. Mark the cup with permanent marker. Also mark another line half way to your original line.

Step 7: Pour resin into the cup to the half line. Pour the hardener to reach the original line.

Step 8: Remove the ink stick from the sharpie and squeeze with pliers into the cup. I only did 2-3 drops into the cup. Mix well with a plastic spoon.

Step 9: Spray your mold and once dried, pour the resin into the mold.

20141027_121735

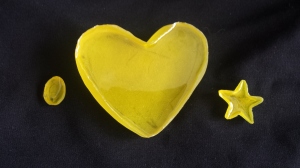
Step 10: Put your mold in bowls or anything that will keep it leveled. Now wait 24 hours for it to cure.

Step 11: Once dried, the bottom looks nice and shiny while the top is dull. This is where the Pour On Gloss Finish comes in. Simply follow step 6 – 8 (ignore the sharpie for this step).

20141027_14523320141027_145219

Step 12: Put the dried objects on bottle caps or anything you can find that will lift it from the level ground. You can now pour on the gloss resin and it will drop off the edges of your objects. For first hour or two, you will continuously need to keep an eye on the object to whip the extra drops from being on your objects.

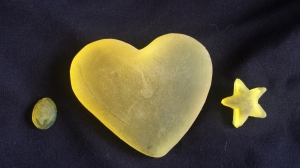
Step 13: This will take up to 24 hours to cure. Once finished, it should look like something below.

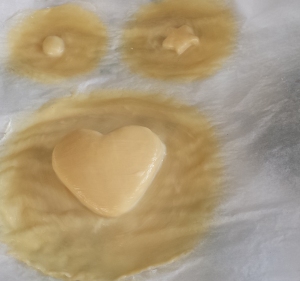
20141027_153154

Types of Face Masks

face masks

Face masks are important to rejuvenate your skin. Here is a list of a few types of face masks we put together:

  1. Sheet Masks: These have gotten pretty popular recently. They help moisturize and give a nice glow to your skin. Using this once a week is good enough. They are great and easy to carry for traveling!
  2. Clay Masks: It has a lot of natural elements that cleanse the skin’s surface. This prevents your skin to dry and it is great for people with oily or acne-prone skin. Clay masks help absorb dirt and grease and is very easy to apply. Simply put the clay mask all over your face and after a certain amount of time (depending on the brand), wash it off.
  3. Peel-Off Masks: This mask has a plasticizing agent that forms a thin film over the face. It helps remove dead skin and blackheads. There is a wide range of face masks for all kinds of skin types.
  4. Hot Oil Face Masks: This you can simply use natural oils you already have at home such as olive oil, extra virgin coconut oil or almond oil. Place one of these oils in a bowl and warm it up by placing the bowl in hot water or microwave. Now rub the oil in circular motion on your face and wash off after. This is ideal for dry or mature skin and helps refine and soften skin.

Information and image source: Google

DIY Pillow Cases

DIY pillow case

I recently did a DIY pillowcase using the tutorial by A Curiously Chic Life.

(Source: https://acuriouslychiclife.wordpress.com/2012/12/15/diy-pillowcase/)

  1. pillowfabricFirst choose the fabric you want to make the pillow case out of. I purchased a yard of the leaf embroidered fabric and a yard of the soft grey fabric from a local fabric store.
  2. The first step was to get cushion pillows. The size I used was 16” x 16”, so I cut a long rectangle piece of fabric. The piece I cut out was 17” wide, which allows a half inch seam allowance on either side and 40” long ([17×2] + 6 = 40) to have one side of the back overlap the other side of the back. See pictures on A Curiously Chic Life’s blog post for reference.
  3. I then ironed half inch in on both sides of the width part of the fabric. Once you iron the first half inch, turn it over to iron another half in of the fabric. This technique for hemming prevents the edge of the fabric from fraying. Repeat the same step on the other short side.
  4. Sew along the edges you ironed.
  5. I then placed the cushion pillow in the middle of my fabric and folded the fabric over.
  6. Fold the other half over the fabric and pin the two flaps of fabric together on either side.
  7. I then removed the pillow and sewed along the edges.
  8. Simply flip the pillow case right side out and you have the finished product!
  9. The result: pillows

DIY Natural Makeup Remover

DIYMAKEUP

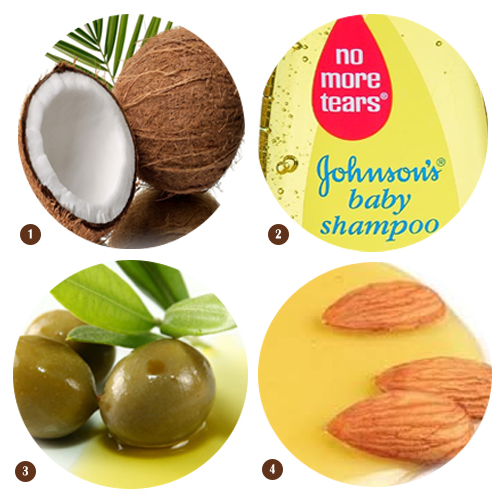
There are a lot of natural makeup removers that you can create from ingredients you may already have in your kitchen or you can simply purchase from your local supermarket.

(Image Source: Google)

natural diy makeup remover

  1. The first one will be a coconut oil makeup remover. All you need is 1 cup of Organic Coconut Oil and a jar. You can melt the coconut oil in a microwave-safe container before storing it in a nice glass jar. You simply just take a cotton pad and put a bit (1 teaspoon) of coconut oil on it to remove your long day of makeup off.
  2. Baby Shampoo does not create any tear for baby’s eyes so it works great as a makeup remover. Apply a few drops to cotton ball to remove makeup.
  3. The third makeup remover would be olive oil which is good for your skin because it not only removes heavy makeup but it acts as a moisturizer as well too. Put some olive oil on a cosmetic cotton pad and gently rub onto your face to take away the makeup and dirt. Plain olive oil works well but it’s better to use extra virgin olive oil. The combination of filtered water and olive oil will result in a hydrating makeup remover!
  4. Another makeup remover is 100% sweet almond oil that is also moisturizing oil. Dab a cotton ball or cotton pad of sweet almond oil and pat over your eyes and face to remove the makeup.

These are just a few out of many DIY makeup removers that you can create.